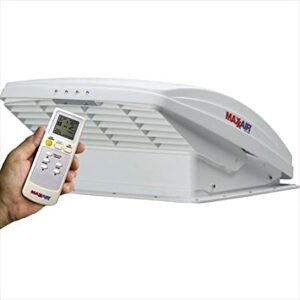
Roof Ventilation Cover


Roof Ventilation Cover
$59.99
About this item
Ventilate your RV during any type of weather and even while traveling. Provides constant airflow throughout your RV reducing heat build-up, allowing musty air, smoke, and cooking odors to escape while protecting against rain or wind damage.
- The leak-proof mounting system eliminates the need to drill any holes in your RV’s roof surface.
- High impact plastic with UV inhibitors.
- Mounting hardware is made of stainless steel or aluminum to provide maximum durability and longer life.
- Aerodynamic design reduces wind resistance while traveling.
- Protects the plastic vent lid from UV, wind, and hail damage.
- Not recommended for use with high-powered vent fans.
- Quick installation.
- Fits most 14″ x 14″ standard roof vents.
- Available in black or white.
QUICK INSTALLATION
Kit Contents
- 4 – 1/4 20 SS carriage bolts
- 4 – 1/4 SS lock washers
- 4 – Aluminum brackets
- 4 – 8/32 SS screws
- 4 – 1/4 SS washers
- 4 – 1/4 20 SS hex nuts
- 4 – 8/32 SS nuts
- 4 – #8 SS flat washers
Tools Required
- Power drill with 3/16 drill bit
- Phillips head screwdriver
- Adjustable wrench
- Pencil
- Place the RV Traveler’s Choice roof vent cover over the roof vent with the louver area facing the rear of the vehicle. After verifying that the RV Traveler’s Choice roof vent cover is centered over the roof vent, trace on your camper roof (with a pencil) the location of the slots in the RV Traveler’s Choice vent cover’s mounting flange.
- Position the roof vent-mounting bracket (included) on your roof so that the slot in the bracket intersects one of the slot locations traced on the roof. For maximum strength place the mounting brackets as close as possible to the outside corner of your existing roof vent frame.
- Mark the location of the screw hole in the bracket onto your RV roof vent frame. Drill through the roof vent frame using a 3/16″ drill bit. Place one of the carriage bolts upward through the slot in the bracket and fasten the RV Traveler’s Choice roof vent bracket to the RV roof vent wall using the small bolt provided. The small washer, lock washer, and hex nut should be placed on the inside of the roof vent frame wall. Install two RV Traveler’s Choice brackets on each side of your RV roof vent as shown in the drawing.
- Place the RV Traveler’s Choice roof vent cover on the four upward-pointing carriage bolts and fasten using the large washers and hex nuts provided. You may have to push the head of the carriage bolt up into the bracket slot to prevent the carriage bolt from turning during the tightening of the hex nuts.
PLEASE NOTE A slight air gap between the base of the roof vent cover and the RV roof after installation is normal and permits condensation to escape.